Download plan as PDF
| Name of the lesson | The water travels |
|---|---|
| Target group | 9-12 years old |
| Duration | 80 minutes (2 lessons X 40 minutes) |
| STEAM Skills/ 21st Century Skills?? |

Critical Thinking Communication Collaboration Creative Thinking Social skills |
| Expected learning outcomes |
By the end of this unit, students will be able to:
|
| Subjects and topics covered |
Subjects: Science, Art Topic: The concept of transpiration |
| Methodologies |
Inquiry based learning |
| Integration of the Arts |
Colour mixing: Primary Colors: Red, Yellow, Blue. Secondary Colors: Orange, Green, Violet. Neutral: black and white |
| Learning Environment |
Classroom (in groups of 3-4) |
| Required resources |
Materials:
|
| Prior knowledge a. teacher b. students |
In order to deliver this lesson, the teacher will need to have an understanding of the respiration and the transpiration process in plants as well as knowledge about the colour mixing. In order to be able to participate and contribute to this lesson, the students will need to know and understand the water cycle and the plant respiration process. |
| Detailed description of the step-by-step sequences of the unit, incl. specific activities to support the learning experience |
Introduction The introduction serves as a refreshing activity to the previous lesson. In groups, students are asked to create a concept map placing key concepts of the process of respiration in plants. To support students’ recalling process, the teacher shares a picture as a reference point (Annex 1). He/she provides assistance to the groups whether needed by asking prompt questions. He/she allows some time and then calls students in plenary discussion. The topics that should be covered in the context of the introductory activity are the following:
STEP 1: Surprise, curiosity, questioning Following the refreshing activity, the teacher informs students that today they will carry out an experiment to learn a new process that happens in plants. He/she presents the materials required and encourages students to guess what they are going to do, how and why. Materials needed to carry out the experiment (for each group):
The teacher challenges students about the number of colours they have available (3) in contrast to the total number of test tubes (6) as well as why he/she gave them these 3 specific colours. He/she prompts students to express their thoughts. Students are expected to say that from these 3 colours they can create more colours by mixing them up together. The teacher distributes the food colours or the watercolours (red, blue, yellow, black and white) and A4 papers to explore colour mixing. Each student works individually but they are free to discuss their observations with their group. From the activity will arise that the red, blue and yellow are primary colours and mixing them together more colours are created called supplementary colours (orange, green, violet). Black and white are neutral. Adding black makes a colour darker and adding white makes a colour lighter. The teacher may use a colour palette to discuss the different combinations and the role of black and white. Also, teachers and students discuss the role of colours in today’s experiment mentioning that colours can make differences more visible to the naked eye. STEP 2: Problem statement The teacher summarises students’ initial ideas about today's experiment and then tells them the leading question “What is transpiration? The experiment will help you explore the process of transpiration in plants which is part of the water cycle.” STEP 3: Hypothesis statement The teacher explains the experiment. Each group fills up the test tubes with the same amount of water. They colour the water of the 6 test tubes using primary (red, blue, yellow) and complementary (orange, violet, green) colours and then place one flower in each one. The teacher challenges students about what will happen if they leave the flowers in the coloured water for a day. The groups discuss internally and then share their hypothesis in plenary. The teacher strolls around and guides students towards the direction of making connections with the discussion carried out in the introduction (e.g. He/she reminds the respiration process, how plants breathe, the different parts of a plant etc.). The lesson will be continued in the following days… STEP 4: Possible explanations, answers and solutions Students come back to continue the lesson and visit their stations to observe any differences. The teacher encourages students to discuss in groups “What do you observe? Why do you think these happened?”. Students are expected to observe that the flowers are colored, the buds opened. Also, that the level of water in each test tube is lower. He/she also reminds the leading question “What is transpiration? Can you explain the process and give a definition?”. A plenary discussion is followed where the teacher and students will discuss the key concepts emerged from the experiment.
The teacher presents a video related to the transpiration process in plants: https://www.youtube.com/watch?v=LFyUDUi5WQI&ab_channel=HomeRevise STEP 5: Design experimental protocols At this stage, each group is called to write down the procedure of the experiment followed in detail. Once they have the experiment protocol, a representative from each group will present the group’s protocol. At the same time, the rest of the students note down any suggestions they might have. At the end of each presentation, students share their suggestions or ask for further clarifications (e.g. You should have also included this, you didn’t mention that fact or observation etc.). The purpose of this activity is mainly to have students rethink the experiment process and understand the importance of the structure process and its value in the scientific research. STEP 6: Confirm or reject hypotheses, compare with established facts Students compare their findings and confirm or reject their hypotheses. A brief reflection is undertaken. Following this, students complete the evaluation worksheet (Annex 2). STEP 7: Re-use in lesson or in everyday situations As a closing activity, students explore the climate and other factors that affect transpiration. Each group is given a factor to discuss and then shares their thoughts in plenary:
Information about each factor Temperature: The warmer the environment, the more strongly the plant transpires Wind: The more blowy, the higher the rate of transpiration Humidity: The higher the humidity, the smallest the rate of transpiration Type of leaves: The larger the leaves, the more intense the transpiration is The opening of stomata: When the plant doesn’t perceive much water, it limits the opening of the stomata and slow down transpiration |
| Gender-inclusive strategies and activities planned |
This activity is gender neutral. Ensure that boys and girls are evenly distributed across the groups, so that the final results are not categorised into ‘boys’ and ‘girls’ prototypes. When observing the group work, the teacher needs to make sure every group member contributes equally. Both girls and boys should participate in plenary discussions. |
| Assessment & Evaluation |
Throughout the lesson, the teacher observes the groups and evaluates students’ level of engagement (e.g. If he/she contributes to the group work, actively participates, proposes personal ideas/suggestions). The formatting assessment is applied in all the stages in order to guide students appropriately and whether needed. In step 6, students complete the evaluation worksheet (Annex 2) in order for the teacher to evaluate their understanding. |
| Annexes |
Reading text Picture Video |
ΑΝΝΕΧ
Annex 1 – Respiration in plants and photosintetis

Source: https://en.wikipedia.org/wiki/Photosynthesis
Annex 2 – Evaluation worksheet
- Explain the transportation process by drawing a sketch in the box below. Remember to place the key concepts where needed.

|
Based on what you have learned today, what do think will happen if you leave the plant in the bag for a day? Explain your thought. |
|
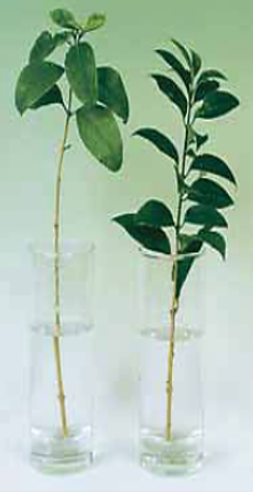
Observe the two plants in the jar. Think what will happen to the level of the water after several days. Explain your thoughts. |