Download plan as PDF
| Name of the lesson | Constructing bridges |
|---|---|
| Target group | 9-12 years old |
| Duration | 2/3 lessons (for a total of 120 minutes) |
| STEAM Skills/ 21st Century Skills?? |

Critical Thinking Entrepreneurship Communication Collaboration Creative Thinking Social skills |
| Expected learning outcomes |
By the end of this unit, learners will be able to:
|
| Subjects and topics covered |
Subjects: Science, Technology, Design, Art Topic: Stability of structures (e.g. Bridges) |
| Methodologies |
Design Thinking |
| Integration of the Arts |
Arts can be integrated during the exercise as students will work on a prototype of bridge, while boosting their creativity and imagination. |
| Learning Environment |
Classroom (in groups of 3-4 students) |
| Required resources |
|
| Prior knowledge a. teacher b. students |
In order to deliver this lesson, the teacher will need to have a good understanding of the Design Thinking methodology. Also, he/she has studied the bridge's stability. In order to be able to participate and contribute to this lesson, the students should have a previous experience with collaborative learning. In case this will be their first time, students should follow the routines established by the teacher. |
| Detailed description of the step-by-step sequences of the unit, incl. specific activities to support the learning experience |
Introduction:Teacher introduces the concept of the lesson. Students place the word “Bridges” in the centre of the map and in groups express their prior knowledge (see Annex 1 for an indicative example of the expected result). Teacher may ask the following questions (or give them printed) to support the process:
Throughout the process, the teacher strolls around and joins groups’ discussion. After a while, he/she calls each group to share their initial thoughts in plenary. *Students may use a digital concept mapping tool such as Inspiration or Kidspiration, Popplet, Creately. STEP 1: Discover The teacher presents the Brooklyn bridge along with a picture of the person who led the completion of the project (Annex 2). The teacher informs students that Mrs. Emily Warren Roebling became the first woman in the field of Engineering, who took the lead and completed the construction of the Brooklyn Bridge, in New York. NB. Emily Warren Roebling has been chosen only to attract more girls and motivate them to take part in the activity. However, you can also choose male models such as Mr. Isambard Kingdom who is remembered for designs for the Clifton Suspension Bridge in Bristol Allow students to express their thoughts. Following that, the teacher prompts students to observe the Brooklyn bridge and discuss its structure with their team members. Students are expected to discuss the main surface of the bridge, the pillars that support the main surface and in general the importance of the pillars in a structure. They may also focus on the width or length of the different parts of the structure. STEP 2: Interpret Students take the role of the “Constructor of a bridge”. They will conduct a science experiment to explore the strength of three different pillars: square, triangular, cylinder in order to decide which pillar can hold more weight and why. The teacher chooses 3 different colors of card paper (e.g. blue, green, yellow). He/she folds the card papers as shown in the tutorial: https://www.youtube.com/watch?v=9Bhl8HkmCzo&ab_channel=Toppr (Annex 3). The teacher should have collected a great number of small to medium size notebooks/books (at least 30) from the school library or from what he/she has available in the classroom/student’s bag. Students may state their hypothesis as well. Then, each column will be tested sequentially by placing the notebooks/books on the top of the column one by one. Count the numbers of notebooks/books and see which column (square, triangular, cylinder) is stronger and capable of holding more weight (Use the same notebooks/books to perform the experiment for all the three shapes). From the experiment will emerge that the cylinder column can hold more weight and the triangular collapsed first. This is due to the fact that the stress distribution at the perimeter of the cylindrical column is equal in contrast to the square and triangular column where the weight is distributed in the corners of each shape. The teacher discusses the findings with the students:
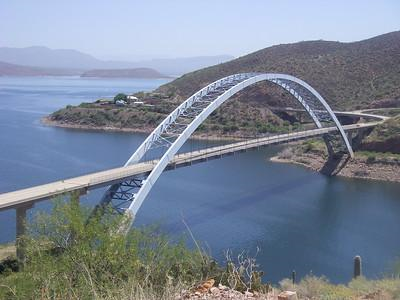
Following the discussion, the teacher informs students that cylinder columns are generally preferred in the construction industry for the above-mentioned reasons. STEP 3: Ideate Each group is given an A4 or A3 paper and is asked to design a stable bridge. Also, the teacher provides pictures of different types of bridges (Annex 4). Teacher strolls around in order to discuss the group's progress and ideas. At this stage, the role of teacher is crucial since he/she should be aware of any major or minor misconceptions or difficulties might arise during prototyping in order to prevent them and guide students properly. Below is a list of the material required (The teacher may adjust this list accordingly):
STEP 4: Prototype Each group builds a bridge with the available material. The teacher supervises the whole process and assists whether needed. Creating a bridge is really easy as different materials can be used and fix together. Obviously, the difficulty of the exercise it is not the creation of the bridge itself but testing of the strength of the bridge (and its stability) and how different materials have different frictions. STEP 5: Test Each group tests its prototype, to identify potential faults and weak points and to address any issues. The teacher asks them to write down what they like most and what they like least about their prototype. The teacher explains that the analysis of the prototype is an important part of the early production process, where many mistakes can be eliminated. Each group presents its bridge to the whole class and explains their decision-making process. At the same time, each student completes the peer assessment form (Annex 5). |
| Gender-inclusive strategies and activities planned |
This activity is gender neutral as ensures the full engagement of both boys and girls in the activity and it also introduces two role models (a male and a female engineer from the past) in the field of Engineering in an effort to give indirect messages for future career opportunities for all students. Do not refer to gender stereotypes but allow students to express any possible thoughts they might have (e.g. women in the field of Engineering). |
| Assessment & Evaluation |
Throughout the lesson, the teacher observes the groups and evaluates students’ level of engagement (e.g. If he/she contributes to the group work, actively participates, proposes personal ideas/suggestions). The Test phase could serve as the final evaluation of the project. Here are some of the criteria the teacher may have in mind:
Besides the teacher, students can conduct peer assessment to provide feedback to their peers’ prototypes of the bridge, following the criteria listed above (Annex 5). |
| Intellectual property rights (IPR) / Origin of the activity |
CC BY-NC-ND: This license allows reusers to copy and distribute the material in any medium or format in unadapted form only, for noncommercial purposes only, and only so long as attribution is given to the creator. |
ANNEXES
Annex 1 – Indicative example of a concept map

Annex 2 – Brooklyn Bridge and Emily Warren Roebling
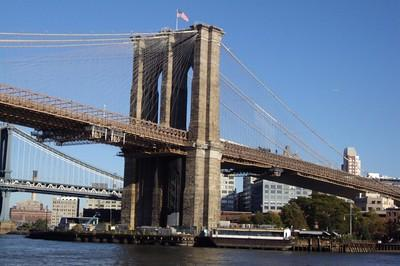
Source: https://www.flickr.com/photos/82134796@N03/9851235213

Source: https://www.flickr.com/photos/peasap/1950224412
Emily Warren Roebling
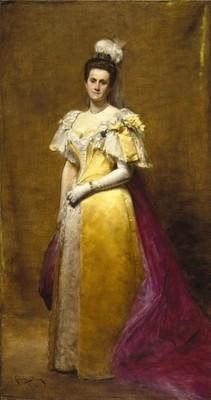
Source: https://www.flickr.com/photos/repolco/17683852400
Annex 3 – Science experiment
Tutorial of the experiment
Source: https://www.youtube.com/watch?v=9Bhl8HkmCzo&ab_channel=Toppr
Annex 4 – Different types of bridges
(The following are indicative examples. The teacher may use different pictures)
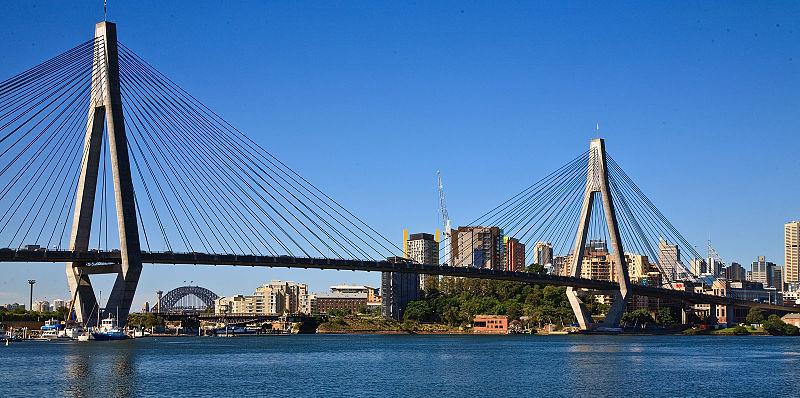
Source: https://commons.wikimedia.org/wiki/File:Anzac_Bridge_and_Sydney_harbour_Bridge_from_Glebe_Point.jpg

Source: https://en.wikipedia.org/wiki/Storstr%C3%B8m_Bridge#/media/File:Storstr%C3%B8msbroen_(Denmark).jpg
.jpg)
Source: https://www.flickr.com/photos/alanenglish/466658759
Annex 5 - Peer assessment form
In the table below, try to evaluate the work of the other groups by using the scale 1-4.
😎 4= The group totally got it
😊 3= The group pretty much got it
😬 2= The group wasn’t all the way
😳 1= The group didn’t got it at all
Bridge’s stability |
Innovation |
Logical explanations about the decision-making process |
|
Group 1 |
|||
Group 2 |
|||
Group 3 |
|||
(Add or remove rows according to the number of the groups) |