Download plan as PDF
| Name of the lesson | Fighting the phenomenon of corrosion |
|---|---|
| Target group | 9-12 years old |
| Duration | 80 minutes (2 lessons x 40 minutes) |
| STEAM Skills/ 21st Century Skills?? |

Critical Thinking Communication Collaboration Social skills Problem solving |
| Expected learning outcomes |
By the end of this unit, learners will be able to:
|
| Subjects and topics covered |
Subjects: Science, Art techniques Topic: Chemical reactions - Corrosion |
| Methodologies |
Inquiry based learning |
| Integration of the Arts |
Arts are integrated in the activity as students acquire knowledge of some important artistic artworks that we can also find in the main museums around the world. At the same time, students discover the materials that compose these artworks and how they undergo transformations over time because of the corrosion phenomena. Pupils can also build manually their own artworks and with the use of simple materials such as clay, wax, plaster etc. |
| Learning Environment |
Classroom |
| Required resources |
|
| Prior knowledge a. teacher b. students |
In order to deliver this lesson, the teacher will need to have a good understanding of the Design Thinking methodology. Also, he/she has studied the bridge's stability. In order to be able to participate and contribute to this lesson, the students should have a previous experience with collaborative learning. In case this will be their first time, students should follow the routines established by the teacher. |
| Detailed description of the step-by-step sequences of the unit, incl. specific activities to support the learning experience |
Introduction Teacher presents a picture of Queen Victoria (Annex 1). You can also choose other examples or statues. He/She asks students if they know who she is and If they do not recognise her, he/she calls students to think who this person might be considering her appearance. Following the brief discussion, the teacher informs students that the person in the picture is Queen Victoria and give them some useful information about her life. Each group is given a printed version of picture 1 (NB. Print it in coulour!) which represents the statue of Queen Victoria (Albert Park, Auckland, New Zealand) and some background information that focuses on the sculptor and the characteristics of the art piece (Annex 2). Students read the information and answer the relevant questions. In plenary, teacher along with the students discuss the following:
STEP 1: Surprise, curiosity, questioning Teacher gives a printed version of picture 2 (Annex 3) and asks students to compare it with picture 1. All pictures should be printed in colour to make the difference visible. In particular, picture 1 shows the statue after conservation and picture 2 before conservation. Call students to observe and allow some time for group discussion. Teacher may use the following questions to guide each group’s discussion:
In picture 1, students are expected to notice that the statue is clean, with no damages and it is covered with a uniform silver color, in contrast to the second one where the color difference, signs, marks and damages on the surface of the statue are visible. STEP 2: Problem statement The discussion will lead to the phenomenon of Corrosion. The teacher explains that metal (such as Iron, Bronze, Copper, Tin etc.) corrodes when it reacts with another substance such as oxygen and other air gasses or even dirt and bacteria. Corrosion can also happen when metals are placed under too much stress causing the material to crack. The teacher informs students that their today’s mission is to investigate how conservators fight corrosion and restore the damage caused by carrying out a simulated, science experiment. STEP 3: Hypothesis statement Students become “Art Conservators”. An Art Conservator restores, preserves and analyzes artifacts and works of art. A career in art conservation requires knowledge of both art and science. Teacher asks students to think how an Art Conservator restores the damage caused by corrosion. Students are expected to mention different kinds of materials and methods. Following the brief discussion and without stating any further details, the teacher explains the science experiment. A penny will represent the statue with corrosion (choose 3 similar pennies), since it is also made of metal and the liquids listed (equal quantity e.g. 20 ml) below will help them observe the chemical reactions. a. Coca cola b. Apple juice c. Vinegar “What is going to happen if we drop a penny with corrosion in coca cola, apple juice and vinegar?” Students write their hypothesis for the three cases in the worksheet (Annex 4). At this stage, the teacher is important to underline that there is no right or wrong hypothesis. Students are allowed some time for discussion and then they are called to share their hypothesis in the plenary. STEP 4: Possible explanations, answers and solutions Each group carries out the experiment by dropping one penny in each container. They are prompt to observe any chemical reactions. The first phase of the experiment has been completed. For the second phase, the pennies will have to stay in the liquids for at least 12 hours (one day). NB. The lesson will be continued in the following days. Or, in the contrary, teachers can also ask students to record the experiments (after the 12 hours) and explain what they see and then continue the discussion once back at school. Students come back, remove the pennies from the liquids and compare them with a shiny and a dirty penny (Annex 5). The groups discuss their findings and give logical explanations. Students are expected to discuss the components of each liquid focusing on the different levels of acidity that contributed to the results. The teacher guides the discussion in plenary where each group tries to give possible explanations. Following the discussion in the plenary, the teacher adds “Conservators use several methods to clean an object, such as extensive washing of the bronze with chemicals that neutralized the corrosion. Acid is a chemical that is used in rust removal formulas”. For the Queen Victoria’s statue, conservators used mechanical and chemical removal. The tools employed included abrasive pads, scalpels, high pressure water washing, and chemical treatment using acid and more. STEP 5: Design experimental protocols Each student writes down the procedure they followed to conduct the science experiment in the science notebook. The teacher supports accordingly. STEP 6: Confirm or reject hypotheses, compare with established facts Groups confirm or reject their initial hypotheses. The main question was “What is going to happen if we drop a penny with corrosion in coca cola, apple juice and vinegar?”. A brief discussion will help them compare their hypotheses with their findings. STEP 7: Re-use in lesson or in everyday situations The teacher asks students if they can think of examples of corrosion in their daily life (e.g. penny, jewellery, engines, handles, chains) and what they can do to prevent corrosion.
|
| Gender-inclusive strategies and activities planned |
This activity is gender neutral. It refers to both a woman and a man representation (Queen Victoria and the sculptor). The teacher needs to ensure that boys and girls are evenly distributed across the groups, so that the final results are not categorised into ‘boys’ and ‘girls’ work |
| Assessment & Evaluation |
Throughout the lesson, the teacher observes the groups and evaluates students’ level of engagement. In step 5, each student will write down the experiment procedure followed to conduct the experiment. In this way, the teacher will be able to evaluate each student's understanding of the science experiment/procedure. |
| Annexes |
Reading text pictures |
ANNEX
Annex 1 – Queen Victoria
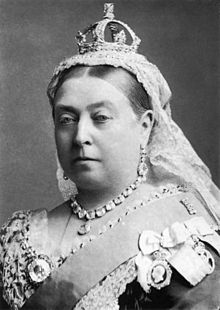
Source: https://en.wikipedia.org/wiki/Queen_Victoria
Annex 2 – The statue of Queen Victoria 1 (picture 1 – after conservation)

Francis John Williamson2 (1833-1920) was a British sculptor who created Queen Victoria’s statue which was installed in Albert Park, Auckland, New Zealand in 1889. It is reputed that he had been Queen Victoria’s favorite sculptor since he produced a number of statues of her. His other work is mainly portrait statues and busts, including memorials. He did however produce some small number of ideal and allegorical works, of such subjects as Spring, Autumn and Sunrise. Williamson's work consistently achieves a nobility through the classical style he favoured, and a calmness and peacefulness of composition.
Answer the following questions:
- What do you notice about the pose of the figure?
- What is this person doing?
- From what material the statue is made of?
- What other details do you notice?
- How is sculpture created?
Annex 3 - The statue of Queen Victoria (picture 2 – before conservation)

Source1: https://statues.vanderkrogt.net/object.php?webpage=ST&record=nz006
Source2: https://www.speel.me.uk/sculpt/williamsonfj.htm
Annex 4 – Hypothesis worksheet
Write a hypothesis for each of the following cases.
Predict what will happen when you drop a penny in the following containers and let them stay for a day:
Coca cola: ………………………………………………………………………………………………………………………………………………………………………………………………………………………………………………………………………………………………
Apple juice:
………………………………………………………………………………………………………………………………………………………………………………………………………………………………………………………………………………………………
Vinegar:
………………………………………………………………………………………………………………………………………………………………………………………………………………………………………………………………………………………………
Annex 5 – Comparison of findings

Place each penny in the appropriate box. Compare your findings with a shiny and a dirty penny.